The Assignment
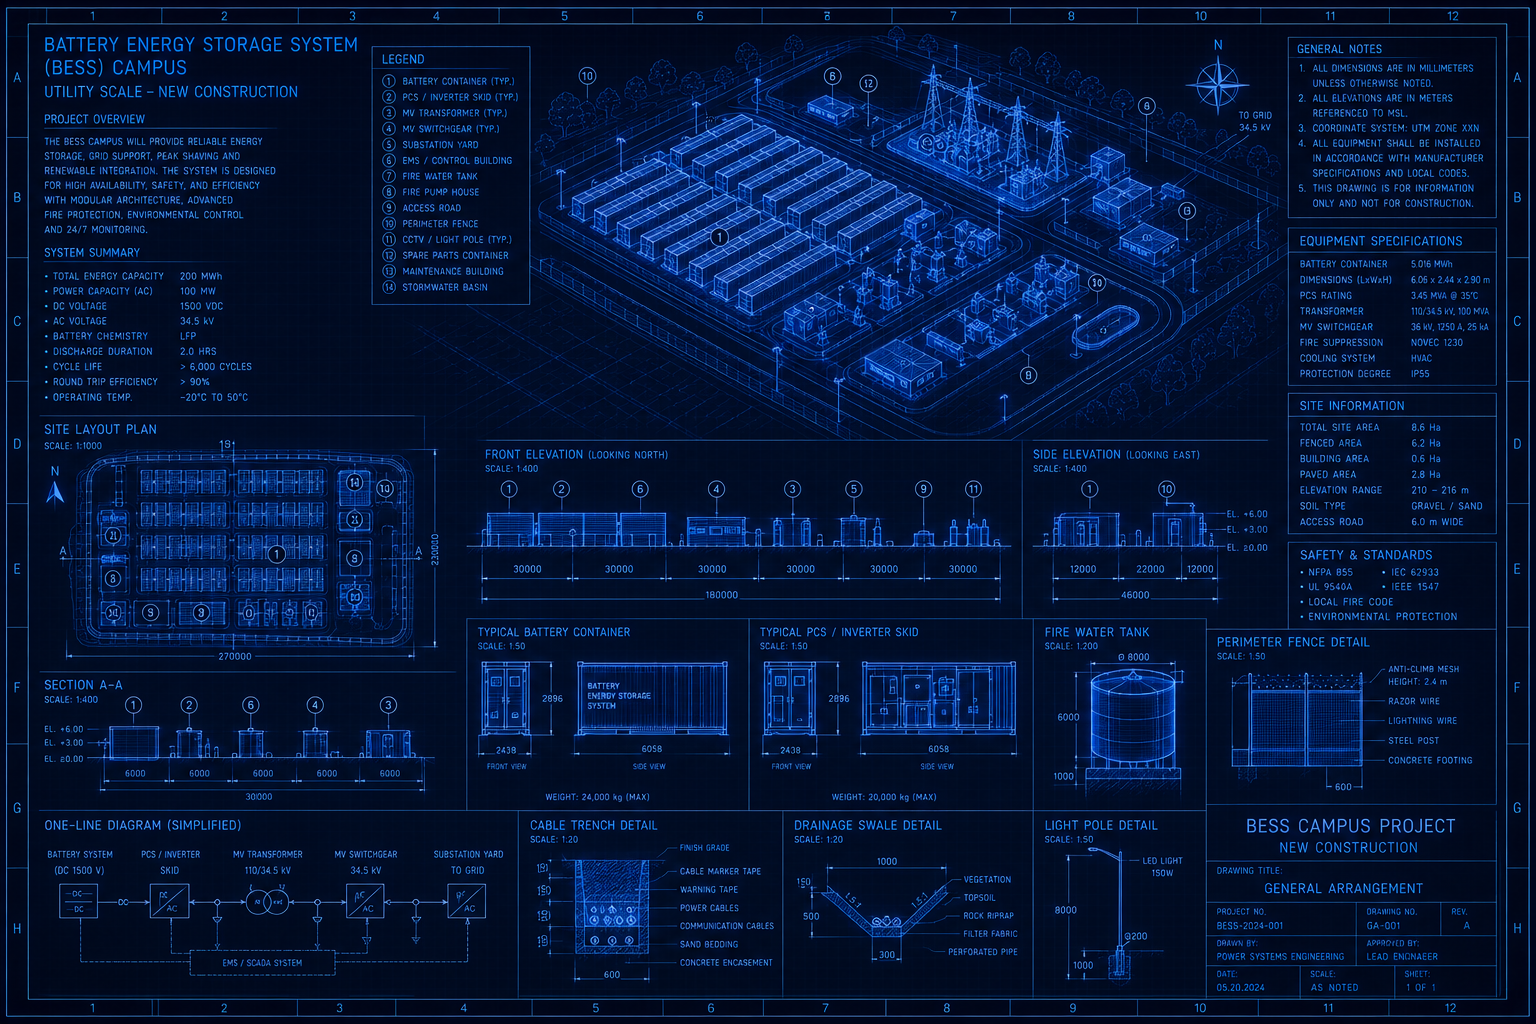
Every other blueprint in this series asks you to build the project schedule yourself. This one asks you not to. Instead, you will guide Maverick's AI through a series of conversational prompts — telling it what project to create, which resources it needs, what tasks go under each phase, and how those tasks connect — and the AI will build the schedule on your behalf. By the end, Maverick contains a complete, linked, baselined project schedule for a fictional 10 MW / 20 MWh Battery Energy Storage System (BESS) facility. You did not enter a single task manually.
A BESS project is a good candidate for this exercise because the domain is specific enough that AI performs well on it, yet unfamiliar enough to most project managers that the AI's output is genuinely useful rather than something you already know by heart. The project involves eight construction phases, three resource types, long-lead procurement with delivery windows that constrain the entire installation schedule, and a utility interconnect test that cannot move — all features that make a schedule interesting to build and worth getting right.
Your role throughout is not passive. You will verify the AI's output at every stage, manually add resource records that the AI cannot create on its own, and correct any structural problems before moving to the next stage. The AI is the builder; you are the inspector.
| Feature | What You Will Practice |
|---|---|
| AI Project Creation | Prompt AI to build the initial phase structure and verify the result |
| All Three Resource Types | AI identifies materials, machines, and human crew via conversational prompts |
| AI Task Generation | AI adds 4–7 tasks per phase with realistic durations and lead times |
| AI Resource Assignment | AI assigns named resources to tasks from the pool you created |
| FS, SS, and FF Dependencies | AI wires phase handoffs, parallel tracks, and shared-closeout tie-ins |
| Critical Path | Identify procurement tasks that may control the project finish date |
| Baseline | Lock the AI-built plan before any work begins |
| AI Self-Review | Ask the AI to analyze and improve its own schedule |
Before You Start
This blueprint uses AI differently from the AI Scheduling steps in the other blueprints. Normally, AI scheduling in Maverick works on an existing project you built manually. Here, the AI builds the project from scratch. That distinction changes what you need to prepare and what you should expect the AI to get right versus what you will need to correct.
The table below summarizes the division of labor. Read it before opening the AI chat so you know which actions require your attention at each stage.
| AI does this automatically | You must do this manually |
|---|---|
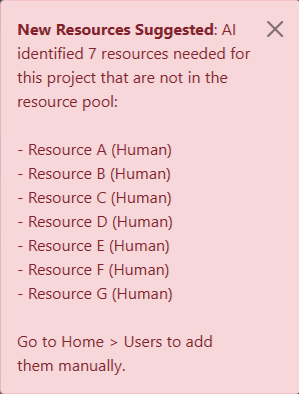
| Creates project name and phase structure | Add resource records to Maverick (Home → Users) |
| Generates task names and durations | Choose resource type (Human, Machine, or Material) for each record |
| Suggests which resources belong on which tasks | Choose the workgroup where each resource is stored |
| Wires task dependencies (FS, SS, FF) | Verify task indent levels and correct any mis-indented tasks |
| Identifies the critical path | Set the baseline (right-click the project) |
| Reviews and explains the schedule structure | Decide whether to accept or modify AI suggestions |
Token budget warning. This exercise sends significantly more data to the AI than a typical scheduling session because the full resource pool must be included in every message. On a project with 20 resources and 50 tasks, each exchange can consume 2,000–4,000 tokens. Make sure you are on an unlimited plan or starting fresh at the beginning of a token renewal period before beginning. The most token-intensive stage is resource assignment (Stage 8) — if you hit a rate limit there, the recovery path is to break the prompt into one phase at a time.
Stage 1: Configure Your AI Model
Maverick omits the resource pool from AI context by default to save tokens. For this blueprint, you need the resource pool included so the AI can assign named resources to tasks. Go to Tools → AI Providers. A grid opens showing your configured providers and models.
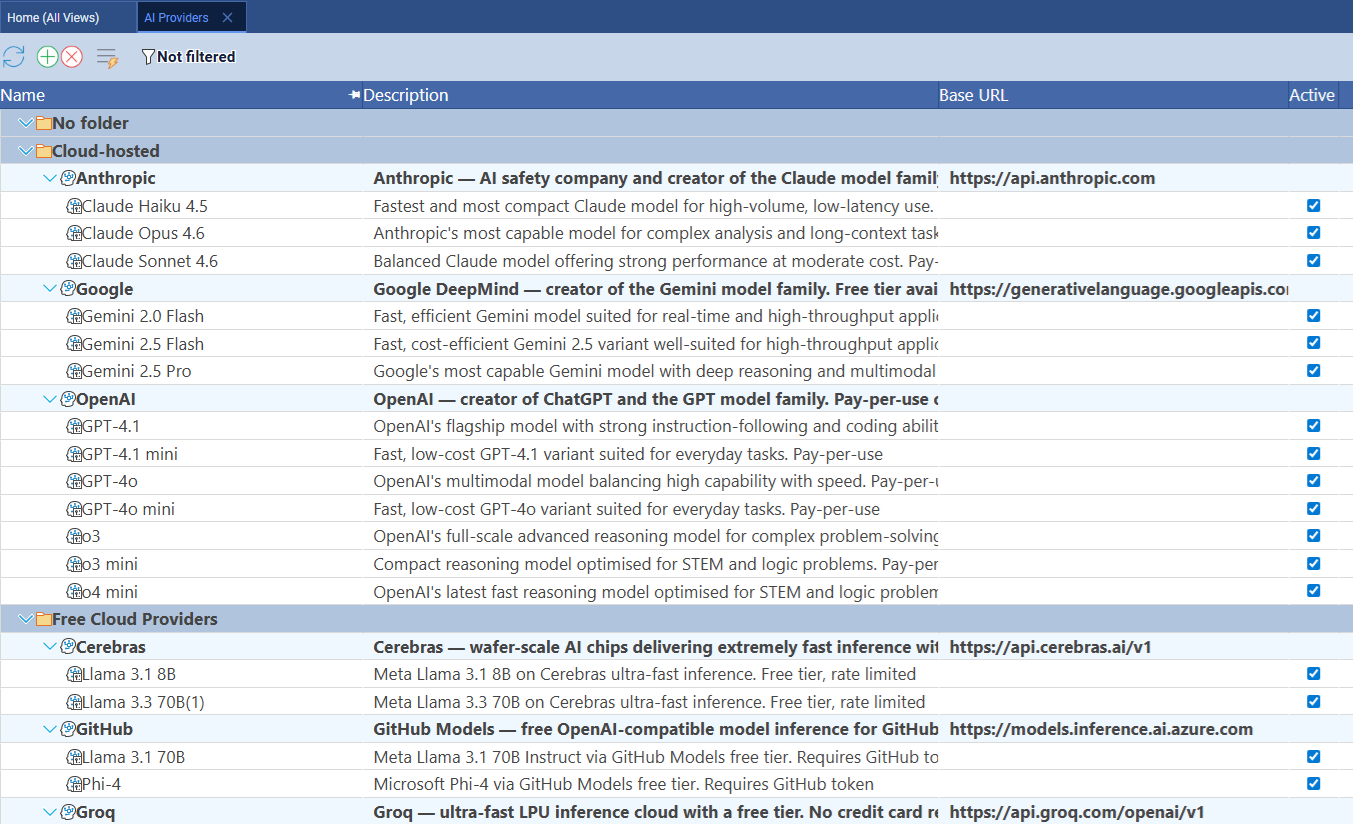
Find your provider and click the model row to open its properties. Look for the Exclude from AI context property and open the checkbox list.
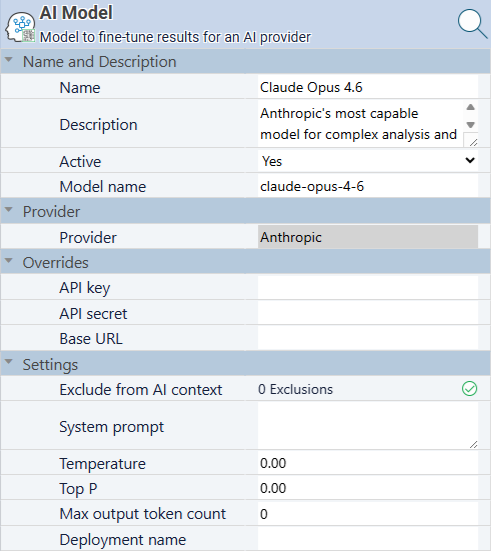
Uncheck both Exclude full resource pool and Exclude resource assignments. Leave all other checkboxes at their defaults. Save and close.
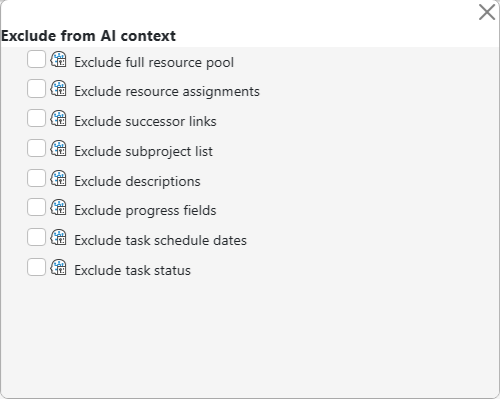
The tradeoff you are making. Including the full resource pool adds every resource record — name, type, workgroup, current assignments — to the context of every AI message. Without it, the AI can suggest resource names in text but cannot actually assign them to tasks, because it does not know what resources exist in your system. With it, the AI can assign by exact name match. The token cost is real but so is the capability gain. When this blueprint is complete, you can re-enable the exclusions to return to normal token consumption for other projects.
Stage 2: Open a Blank AI Session
Before opening any project, go to View → Chat With AI. The chat window opens without a project loaded. This is the starting state for this blueprint — do not open the BESS project first, because the project does not exist yet.
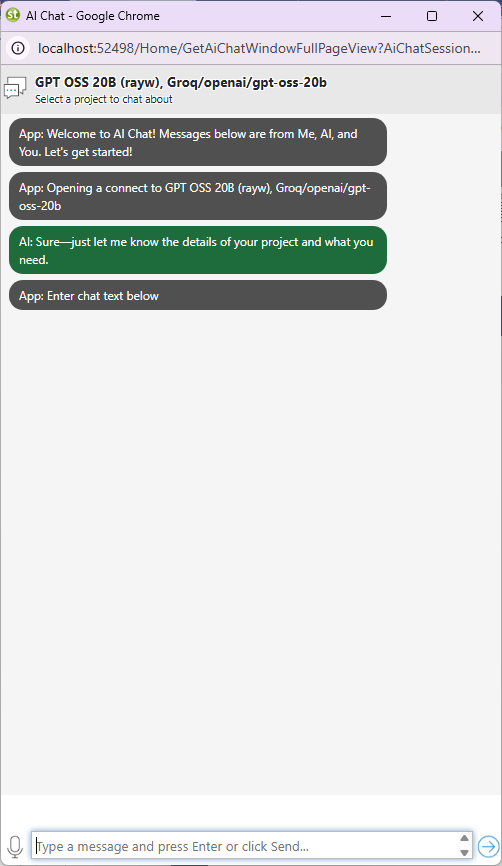
Why no project should be selected. When a project is open in the chat context, every AI action applies to that project. Starting with no project selected puts the AI in project-creation mode — it can create new projects rather than only modifying an existing one. If you accidentally open a project first and then issue the creation prompt, the AI may interpret it as a request to add phases to the current project rather than creating a new one. Close all open projects and open the chat fresh.
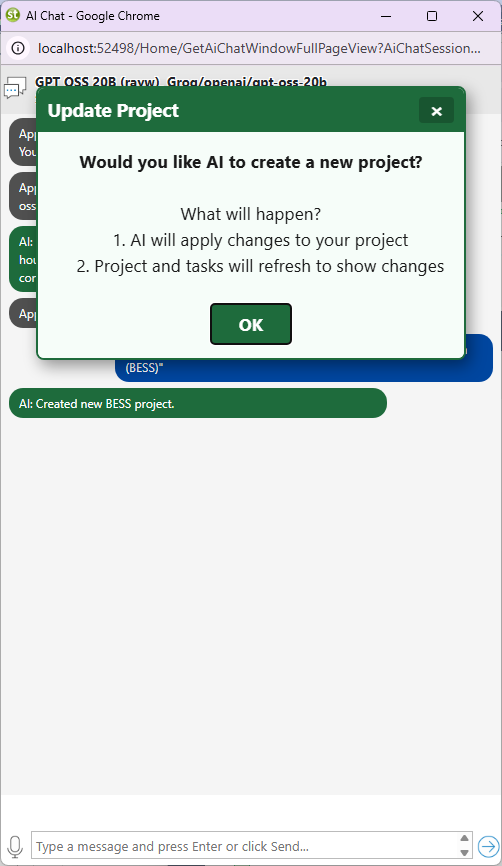
Stage 3: Create the Project Structure
With the blank chat open, send the AI the project creation prompt. Keep it focused on summary phases only — do not ask for individual tasks yet. Adding tasks in a separate stage gives you a checkpoint to verify the phase structure before the AI fills it with 50-plus tasks that would be harder to reorganize.
Create a new project named 'Battery Energy Storage System (BESS)'. Add only the top-level summary phases — do not add individual tasks yet. Use these phases: Site Preparation, Civil & Structural, Battery Module Installation, Power Conversion System, Electrical Balance of Plant, Controls & SCADA, Commissioning & Testing, Grid Interconnect.
The AI will confirm the project and list the phases it created. Verify the response before proceeding.
To confirm the structure in Maverick, go to Home → Projects, right-click the new project row, and choose Admin → Subprojects. All eight phases should appear as subproject entries.
Summary tasks and subprojects are the same thing. Maverick uses both terms interchangeably. In the Gantt chart, summary tasks appear as bold parent rows with an expand/collapse triangle. In the Admin → Subprojects popup, they appear as a flat list you can reorder or rename. If any phase name is wrong or in the wrong order, correct it now in the Subprojects popup before the AI adds 50-plus tasks underneath it. Rearranging summary tasks after they have children is significantly more work.
Stage 4: Add Material Resources
Ask the AI to identify the materials the project will consume. Send this while still in the blank chat session — or switch to the BESS project context now that it exists. The AI will return a grouped list of materials by phase.
For the BESS project, identify the material resources needed across each phase. List each material with the phase where it is consumed, the typical unit of measure (each, ton, meter, etc.), and an estimated quantity for a 10 MW / 20 MWh system. Group by phase.

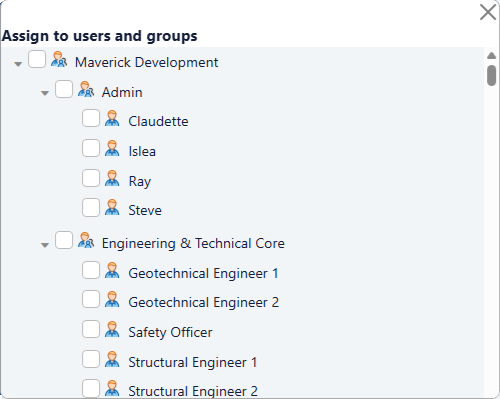
Review the list, then add the materials you want to track in Maverick. Go to Home → Users, click a workgroup, then click the green + button. Set the Username to the material name exactly as the AI listed it. Set the Resource type to Material.

Name materials for AI clarity, not for human readability. The AI will search the resource pool by exact name match when assigning resources to tasks. A name like Battery Cells (LFP) tells the AI which chemistry and what role the material plays, so it assigns it to battery module installation tasks rather than electrical tasks. A name like cells is ambiguous — the AI may skip assignment entirely or guess wrong. Do not include type labels like (material) in the name; the Resource type property already captures that.
Stage 5: Add Machine Resources
Send the AI a second prompt to identify heavy equipment for the project.
List the heavy equipment and machines needed to construct a 10 MW / 20 MWh BESS facility. For each machine, indicate which project phases it is active in and whether it is needed full-time or only for specific tasks.
Add each machine to Maverick the same way as materials. Set the Resource type to Machine. Typical machines the AI will suggest: mobile crane, rough-terrain forklift, concrete pump truck, cable-pulling equipment, hydraulic torque tools, personnel lift, and battery module transport dolly.
BESS sites use more lifting equipment per square foot than most construction projects. Battery modules arrive individually, each weighing 1–3 tons, and must be positioned precisely in rack enclosures inside the battery containers. The mobile crane and forklift run nearly continuously during the Battery Module Installation phase, making them likely critical-path resources. If the AI does not list a battery module transport dolly as a machine resource, add it manually — it is often the chokepoint between delivery staging and rack installation when multiple containers are loaded simultaneously.
Stage 6: Add Human Resources
The third resource prompt covers the project's crew and specialist roles.
List the human resources required for a 10 MW / 20 MWh BESS project. For each role, specify which project phases they are involved in and whether they are full-time crew or milestone-based specialists.
Add each human resource to Maverick with Resource type set to Human. Typical roles: Civil Crew, Electrical Crew, Battery Technician, Commissioning Engineer, SCADA Integrator, Protection Relay Specialist, Utility Interconnect Inspector.
Two roles are almost always single-point constraints. The Commissioning Engineer and the Protection Relay Specialist are both certified roles where the same individual must be physically present for each milestone — the commissioning engineer cannot delegate the AC charging test, and the relay specialist cannot send a colleague to set protection curves. Before finalizing the resource pool, confirm both roles are available during the commissioning window. If either is already committed to another project, the resource allocation bar chart will show a red overallocation bar that no amount of task resequencing can resolve — only resource substitution or schedule adjustment helps.
Fun Fact: Why Battery Chemistry Shapes the Construction Schedule
The battery chemistry specified in a BESS project has a direct effect on the construction schedule — not just the system's operating life. Different chemistries require different handling equipment, storage conditions, and commissioning procedures, which changes the task durations in Battery Module Installation and Commissioning & Testing. A project specifying Vanadium Flow chemistry, for example, will have an electrolyte filling step and a long formation cycling phase that does not exist at all in an LFP project.
| Chemistry | Round-Trip Efficiency | Cycle Life | Thermal Risk | Schedule Impact |
|---|---|---|---|---|
| LFP (Lithium Iron Phosphate) | 95–98% | 3,000–6,000 cycles | Low | Standard; dominates grid-scale BESS in the US |
| NMC (Nickel Manganese Cobalt) | 92–96% | 1,000–2,000 cycles | Moderate | Tighter thermal management tasks in commissioning |
| NCA (Nickel Cobalt Aluminum) | 90–95% | 800–1,500 cycles | Higher | Fire suppression system adds a separate commissioning phase |
| VRLA (Lead-Acid) | 75–85% | 200–400 cycles | Low | Short cycle life means replacement is a scheduled event within project life |
| Vanadium Flow | 70–80% | 20,000+ cycles | Very Low | Electrolyte filling and formation cycling add 2–3 weeks to commissioning |
| Al-ion (Aluminum-ion) | 92–96% | 10,000+ cycles | Very Low | No dendrite formation; no specialized electrolyte handling; commissioning mirrors LFP |
LFP became the dominant grid-scale chemistry not because it is the most efficient, but because it offers 3–5 times more cycles than NMC at significantly lower thermal risk — and stationary storage does not penalize the chemistry's greater weight the way a vehicle would. A 20 MWh LFP system cycling once daily reaches 3,000 cycles in roughly eight years, delivering its full design life with minimal degradation. The same system in VRLA would require replacement every one to two years. LFP was invented in 1997 and largely ignored for portable applications for two decades; it was the grid-scale market that recognized the value of a chemistry that trades energy density for durability. For US battery storage deployment data by technology, see the U.S. Energy Information Administration Battery Storage Data.
Stage 7: Ask AI to Build the Task List
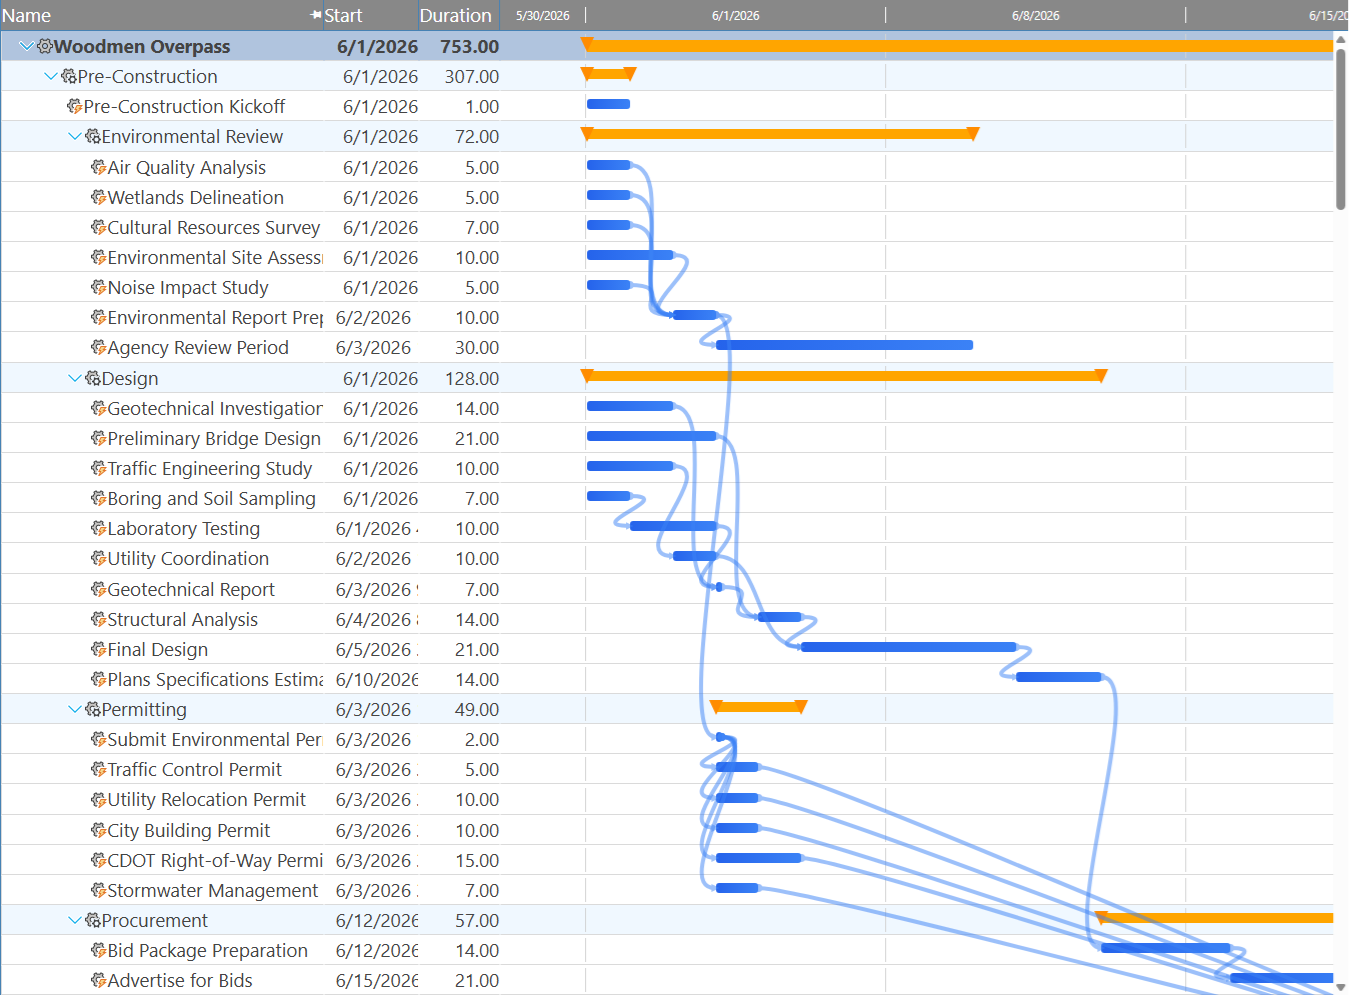
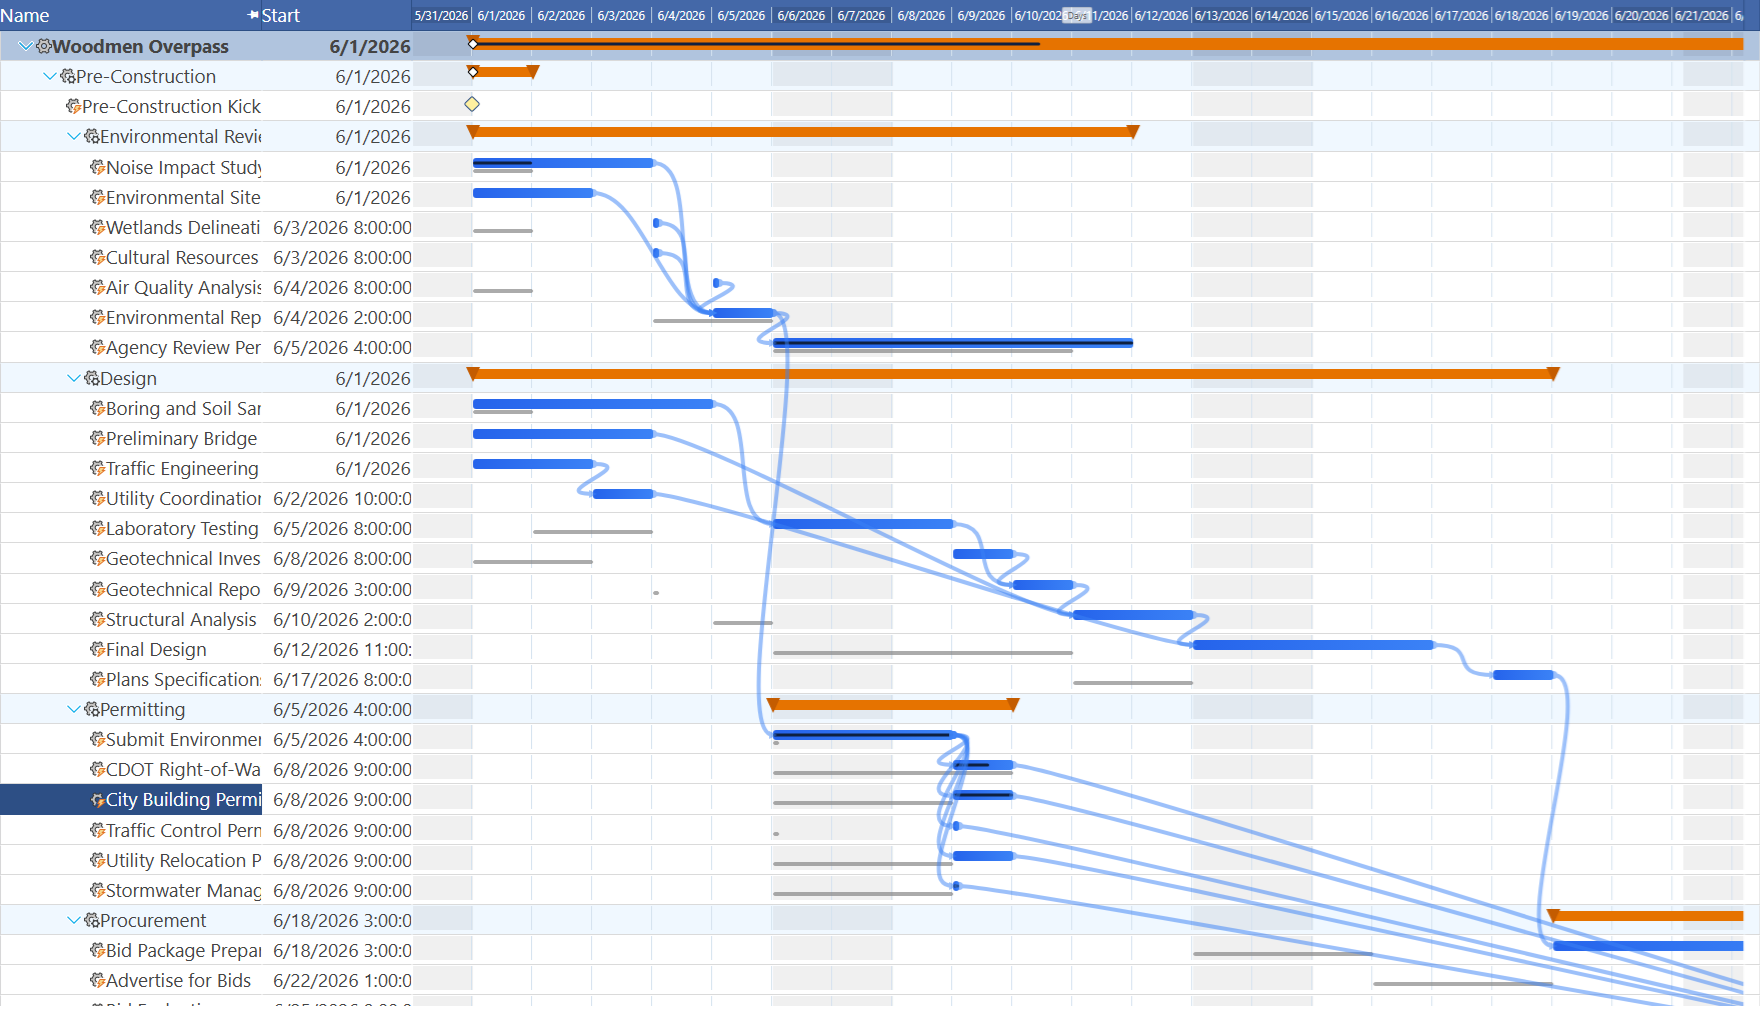
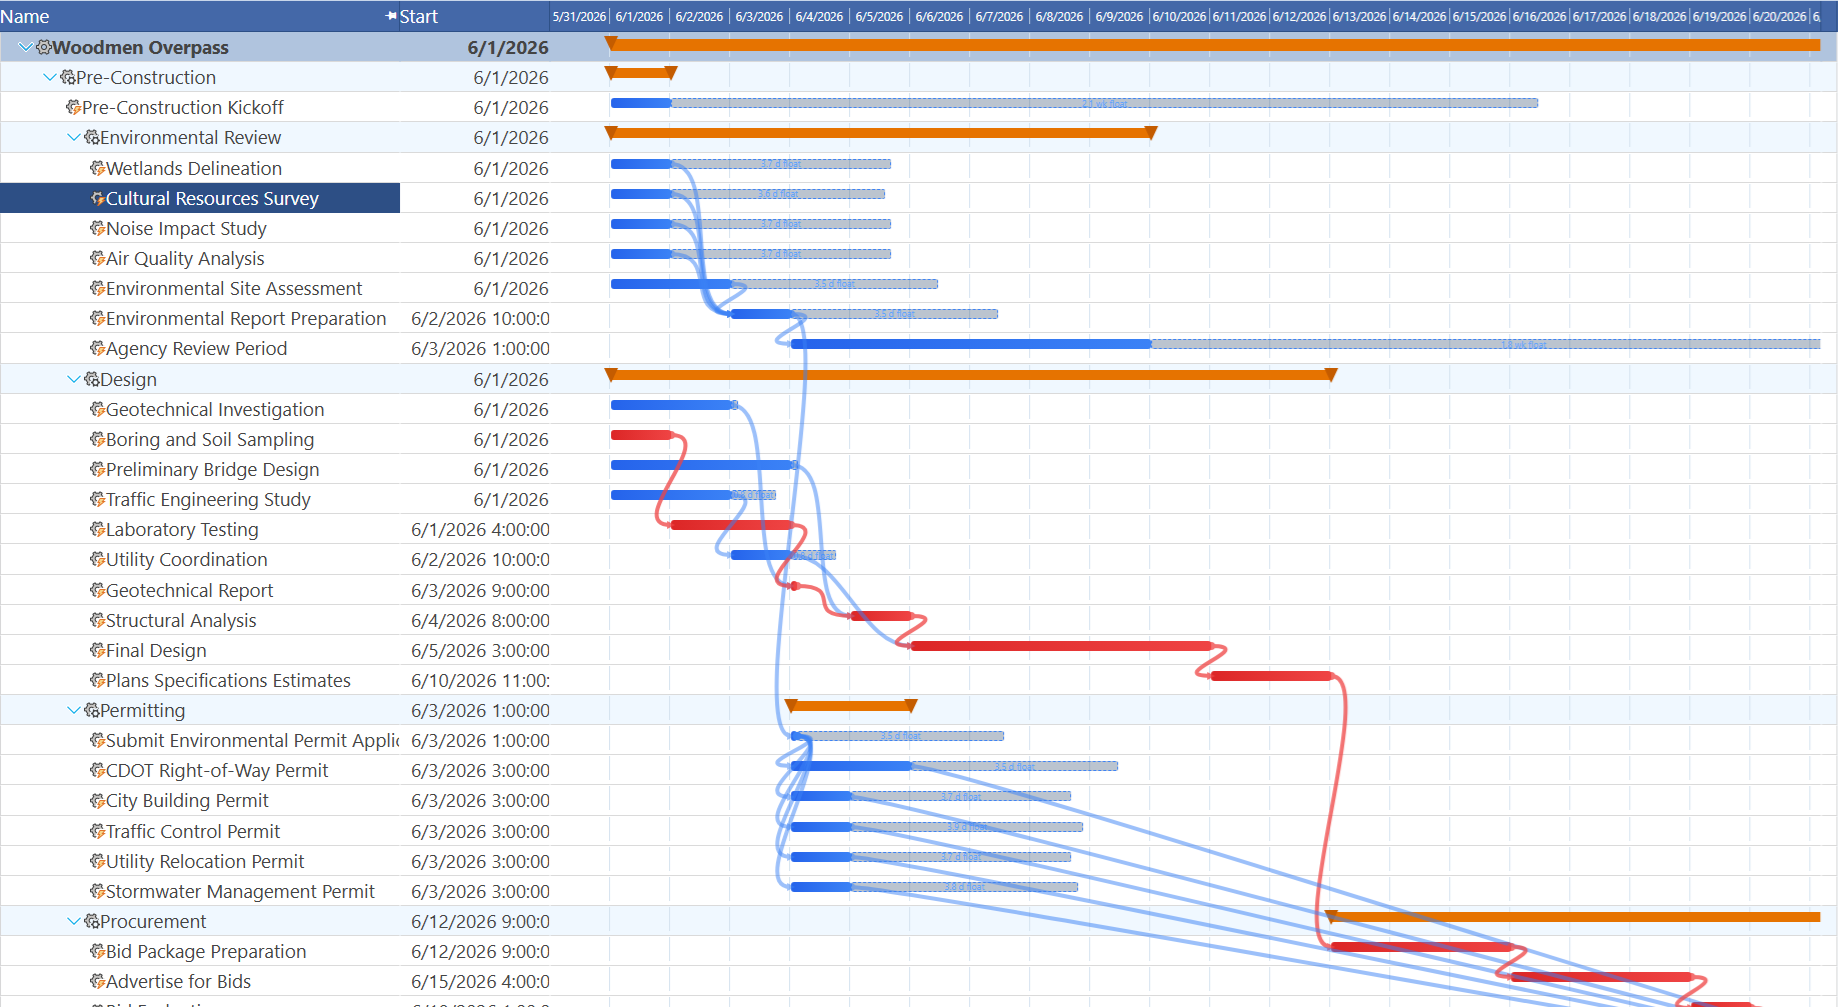
With all resources in Maverick, send the task-generation prompt. The AI will add individual tasks under each of the eight summary phases. This is the most structurally important step in the blueprint — errors here propagate forward into resource assignment and dependency wiring.
Now add individual tasks under each summary phase of the BESS project. Each phase should have 4 to 7 tasks with realistic durations in working days. Include at least one procurement task with a long lead time — note the lead time in the task name. Do not assign resources yet.
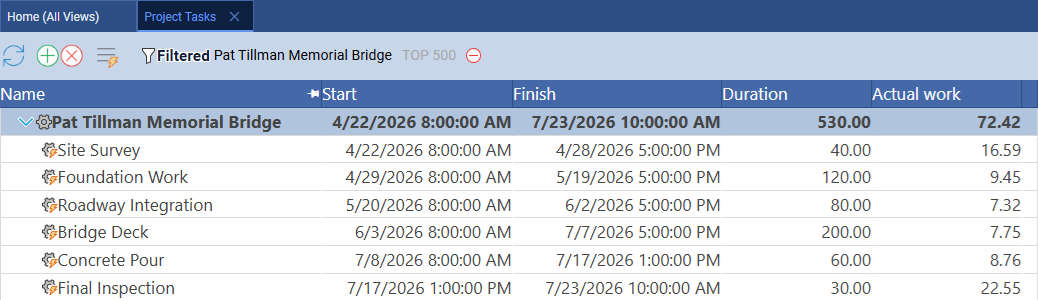
The table below is one example of what the AI might produce for three of the eight phases. Every AI session will generate different task names, durations, and groupings — do not expect your output to match this exactly. Use it as a reference for the kind of detail to look for, not as the answer to check against.
| Phase | Task | Duration | Typical Resource |
|---|---|---|---|
| 1 — Site Preparation | Geotechnical survey | 3 days | Civil Crew |
| 1 — Site Preparation | Permits & environmental clearance | 5 days | Civil Crew |
| 1 — Site Preparation | Substation pad & drainage grading | 8 days | Civil Crew |
| 1 — Site Preparation | Temporary power & site office | 2 days | Electrical Crew |
| 3 — Battery Module Installation | Battery enclosure delivery & staging | 1 day | Crane, Forklift |
| 3 — Battery Module Installation | Battery rack installation (Block A) | 6 days | Battery Technician, Crane |
| 3 — Battery Module Installation | Battery rack installation (Block B) | 6 days | Battery Technician, Crane |
| 3 — Battery Module Installation | Battery module electrical connections (Block A) | 4 days | Electrical Crew |
| 3 — Battery Module Installation | Battery module electrical connections (Block B) | 4 days | Electrical Crew |
| 3 — Battery Module Installation | BMS installation & configuration | 5 days | SCADA Integrator |
| 7 — Commissioning & Testing | Protection relay settings & testing | 3 days | Relay Specialist |
| 7 — Commissioning & Testing | AC charging test | 2 days | Commissioning Eng |
| 7 — Commissioning & Testing | Full discharge & cycle test | 3 days | Commissioning Eng |
| 7 — Commissioning & Testing | Utility interconnect test | 2 days | Commissioning Eng, Utility Inspector |
| 7 — Commissioning & Testing | Final acceptance & handover | 1 day | Commissioning Eng |
Verify the hierarchy before moving on. After the AI adds tasks, open Home → Project Tasks and check the indent levels. A task that should be a subtask but appears at the summary level will behave as a top-level phase in the Gantt, skewing duration rollups and critical path calculations. A summary phase buried as a child task will not appear in the Subprojects list. Correct any mis-indented tasks in the Properties panel before proceeding to resource assignment — it is far easier to fix the structure now than after 40 resources have been assigned.
Stage 8: Assign Resources via AI
With the full resource pool in Maverick and tasks in place, ask the AI to assign resources to each task by name. The AI will match its suggestions against the exact names you created in Stages 4–6.
Assign the resources from the resource pool to each task in the BESS project. Use the exact resource names from the resource pool. Set allocation to 100% for primary assignments. Assign materials to the task where they are physically installed, not to procurement tasks.
If the AI session times out mid-assignment, you will see an error. Do not retry the full-project prompt — the partial assignments the AI already applied are correct, and a second full-pass would attempt to re-assign everything, potentially creating duplicates. Instead, prompt by phase:
Assign resources to the Battery Module Installation phase tasks only. Use the exact resource names from the resource pool.
After all phases are assigned, check the resource allocation bar chart for over-allocated resources.
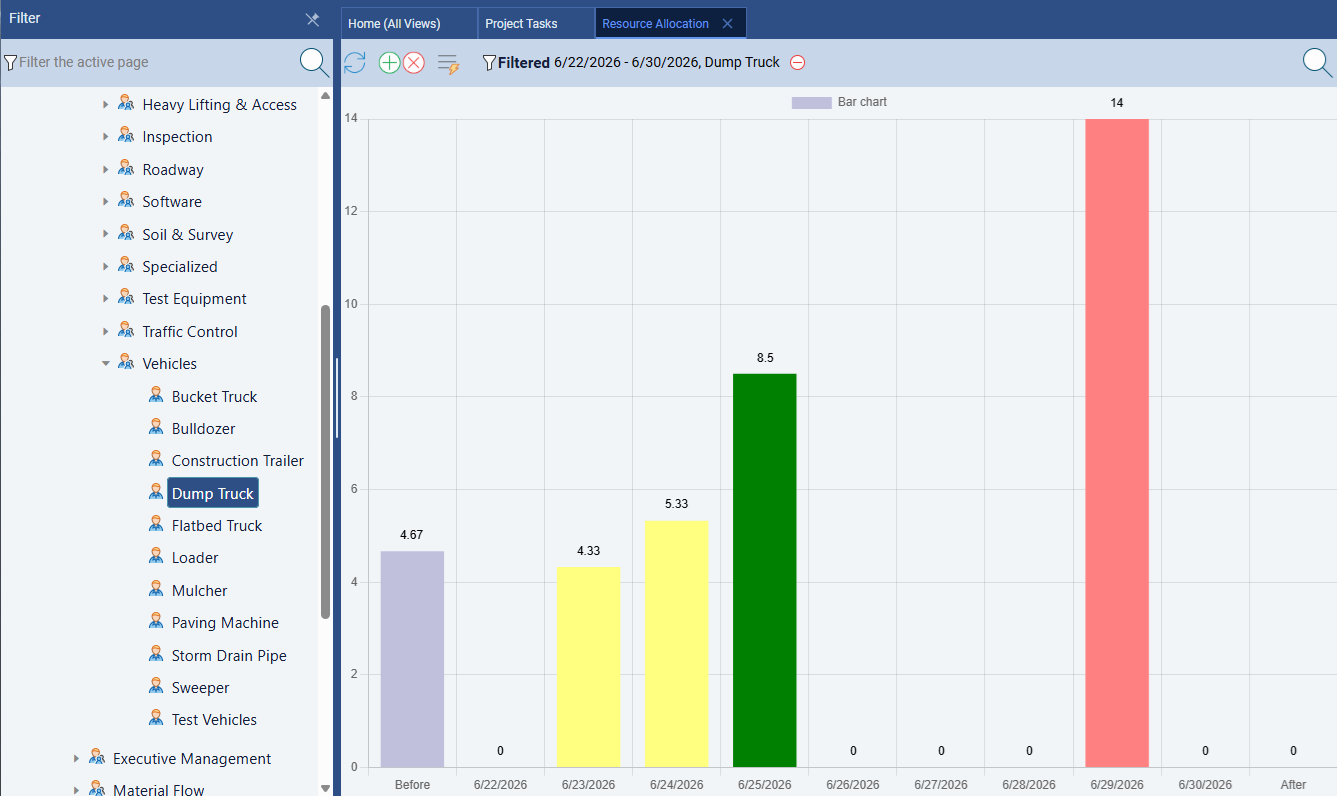
Red bars in the allocation chart mean the AI double-booked a resource. The most common cause is assigning the Commissioning Engineer or Relay Specialist to overlapping tasks in the Commissioning & Testing phase. Both are single-person resources, and if the AI interpreted two tasks as parallel when they are actually sequential, both tasks will show a red overallocation bar. Ask the AI: "The Commissioning Engineer is over-allocated in the Commissioning & Testing phase. List every task assigned to this resource and their dates. Suggest which ones should be sequential rather than parallel." Then apply the fix before setting the baseline.
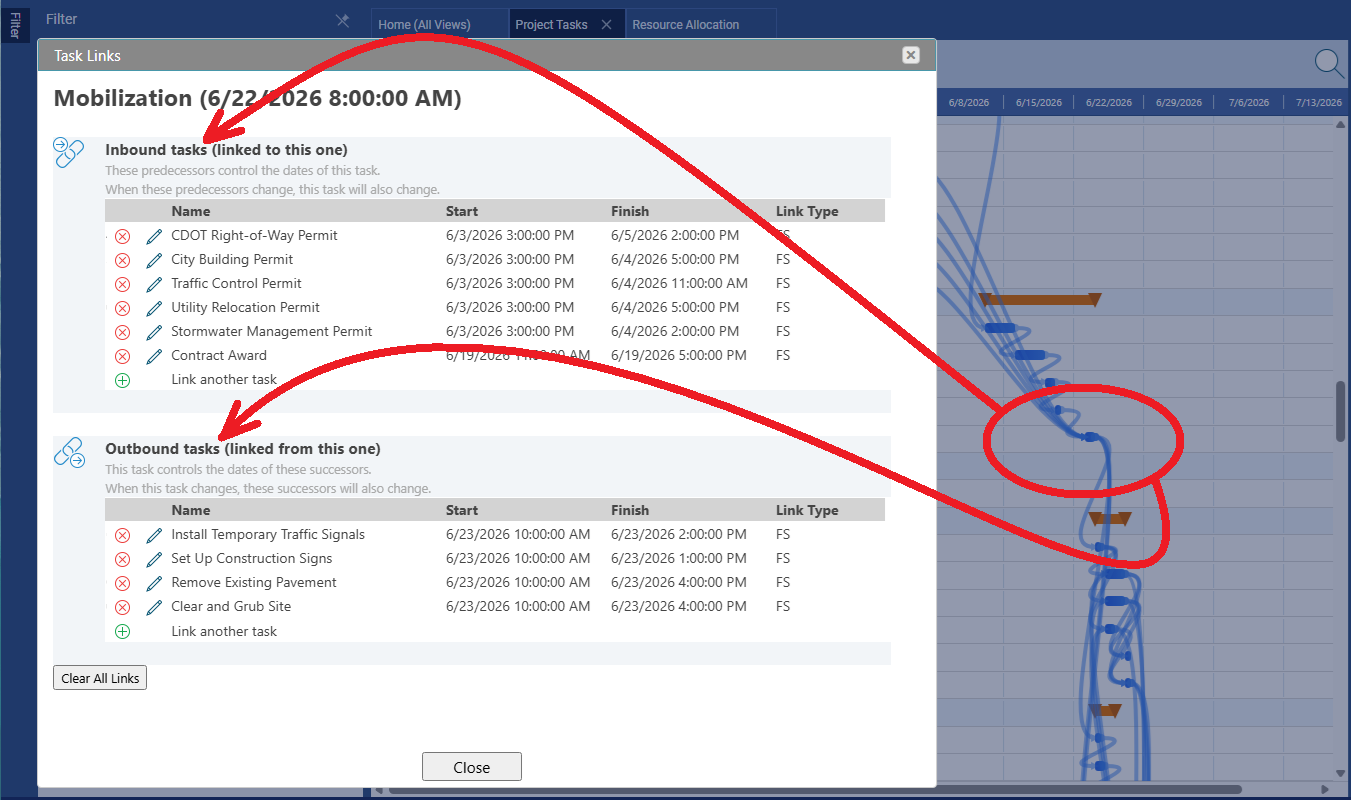
Stage 9: Wire the Dependencies
A task list with no dependency links produces a Gantt where every task starts on the project start date. Send the dependency-wiring prompt next.
Add Finish-to-Start dependencies between the BESS project tasks. Phase handoffs should be FS. Within phases, use Start-to-Start links where tasks can overlap without a resource conflict. Link long-lead procurement tasks as predecessors to the installation tasks they supply. Identify any Finish-to-Finish relationships where two systems must close together.
The FF relationship to watch for in a BESS project is between the battery management system (BMS) commissioning and the power conversion system (PCS) commissioning. Both systems share a final integration test — neither can be signed off until the other confirms readiness. The AI should wire these as a Finish-to-Finish link, which pins both bars' right edges together in the Gantt. If the AI does not identify this link on its own, add it with a targeted prompt:
Are there any Finish-to-Finish relationships in the BESS project? Specifically, do the BMS configuration and PCS commissioning tasks need to complete together before the utility interconnect test can begin?
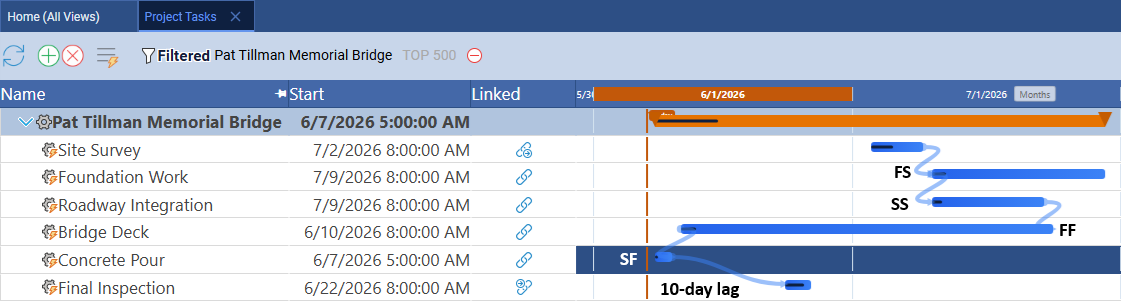
Finish-to-Finish in a BESS context. BMS and PCS are separate systems installed and tested by different crews. The battery management system handles cell-level monitoring and protection; the power conversion system handles DC–AC inversion and grid interface. Neither system can be signed off independently because the final integration test requires both to communicate simultaneously. An FF link captures this: both tasks can start whenever they are ready and run in parallel, but neither closes until both are ready to confirm the handshake. In the Gantt, FF arrows connect right-edge to right-edge — visually distinct from the end-to-start arrows of FS links.
Stage 10: View the Gantt Chart
Go to Home → Project Tasks and look at the Gantt bars. With eight phases and dependencies in place, the schedule should cascade left to right across the timeline, with each phase starting after its predecessor completes and some tasks overlapping within phases via SS links.
What a correct Gantt looks like vs. a broken one. A correctly linked AI-built schedule shows task bars spread across the timeline, with link lines connecting them in visible chains. If the Gantt shows all tasks stacked at the project start date — a bar-code pattern with no horizontal spread — dependencies are missing or were not saved. Go back to Stage 9 and ask the AI: "List all tasks in the BESS project that have no predecessors and no successors. Which of these should have at least one link?" That output identifies the floating tasks to focus on first.
Stage 11: Set the Baseline
Right-click any project row and choose Advanced → Set baseline for all tasks. Maverick locks the current start and finish date of every task as the reference plan. Ghost bars will appear in the Gantt for each task.
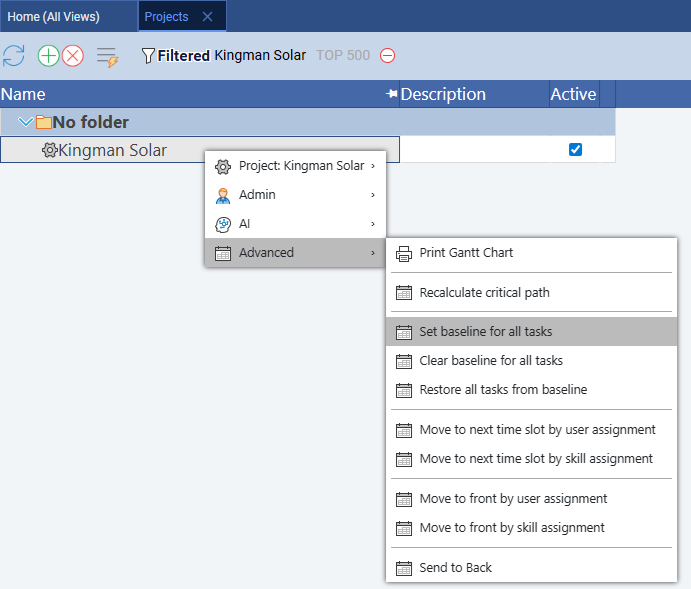
An AI-built baseline deserves more scrutiny, not less. A manually entered schedule has been reviewed task by task as it was built. An AI-built schedule has not. Set the baseline at this stage, but treat it as a first draft rather than an approved plan. After Stage 13 (AI self-review), the AI may suggest structural changes — task resequencing, duration adjustments, dependency corrections. If you apply those changes, clear and reset the baseline before any work begins so the ghost bars reflect the corrected plan. Clearing is in the same right-click menu: Advanced → Clear baseline for all tasks.
Look for small gray bars sitting just below each task bar. Those are your baseline ghost bars — indicators of where each task was originally scheduled when you locked the plan. As the project progresses and dates shift, the ghost bars stay in place while the live bars move. If a live bar drifts right of its ghost, that task has slipped. If it sits to the left, the task finished earlier than planned. The further the two bars diverge, the more the schedule has moved from the AI-generated baseline you set here.
Stage 12: Run the Critical Path
Right-click any project row and choose Advanced → Recalculate critical path. Critical tasks appear in red. On a BESS project the critical path typically flows through civil foundations, battery module installation, BMS configuration, and the utility interconnect test — the final gate before the system can export power to the grid.
Watch for red bars on procurement tasks. Battery cells, inverter modules, and medium-voltage transformer equipment commonly have lead times of 12–26 weeks. If any procurement task is on the critical path, the delivery date — not the field crew — controls the project finish. A one-week delay in placing the battery cell order translates directly to a one-week project overrun with no way to recover it in the field. Ask the AI: "Which procurement tasks are on or near the critical path? What is the total float on each?" If float is less than two weeks on any long-lead procurement task, flag it immediately.
Stage 13: Ask AI to Review Its Own Work
Open the AI chat for the BESS project (right-click the project row and choose AI → Chat with AI) and ask it to evaluate the schedule it built.
Review the complete BESS project schedule. Identify any tasks that appear in the wrong sequence, any resources that are over-allocated, and any phase where the duration seems too short or too long for a 10 MW / 20 MWh system. Suggest specific changes.
Quick prompts to try on the BESS project:
- Which procurement tasks are on or near the critical path, and what is the float on each?
- The utility interconnect window is fixed. Working backward from that date, what is the latest start date for battery module installation?
- The Commissioning Engineer is over-allocated in the Commissioning & Testing phase. Which tasks should be sequential rather than parallel?
- Which tasks have the least float? If any slipped by 3 days, what is the impact on the project finish date?
- Are there any phases with no dependencies connecting them to the rest of the project? List any orphaned task chains.
- We need to compress the schedule by two weeks. Which tasks in the critical path are good candidates for fast-tracking or crashing?
- Summarize the project at a glance: total duration, number of critical tasks, total float in the schedule, and the three biggest schedule risks.
- Draft a one-paragraph project summary I can share with the project owner before construction begins.
Stage 14: Explore the Full Schedule
Go to Home → Project Tasks. To isolate the BESS project from other projects you may have open, choose View → Filter, expand the Projects section in the filter panel, and click the BESS project. Only its tasks remain visible.
Switch to the resource-centric Gantt to see the AI-assigned resources across the full schedule. Each row is a resource; each bar represents a task assigned to that resource. Human crew, machines, and materials appear in the same view, making it easy to confirm that all three resource types were assigned correctly.
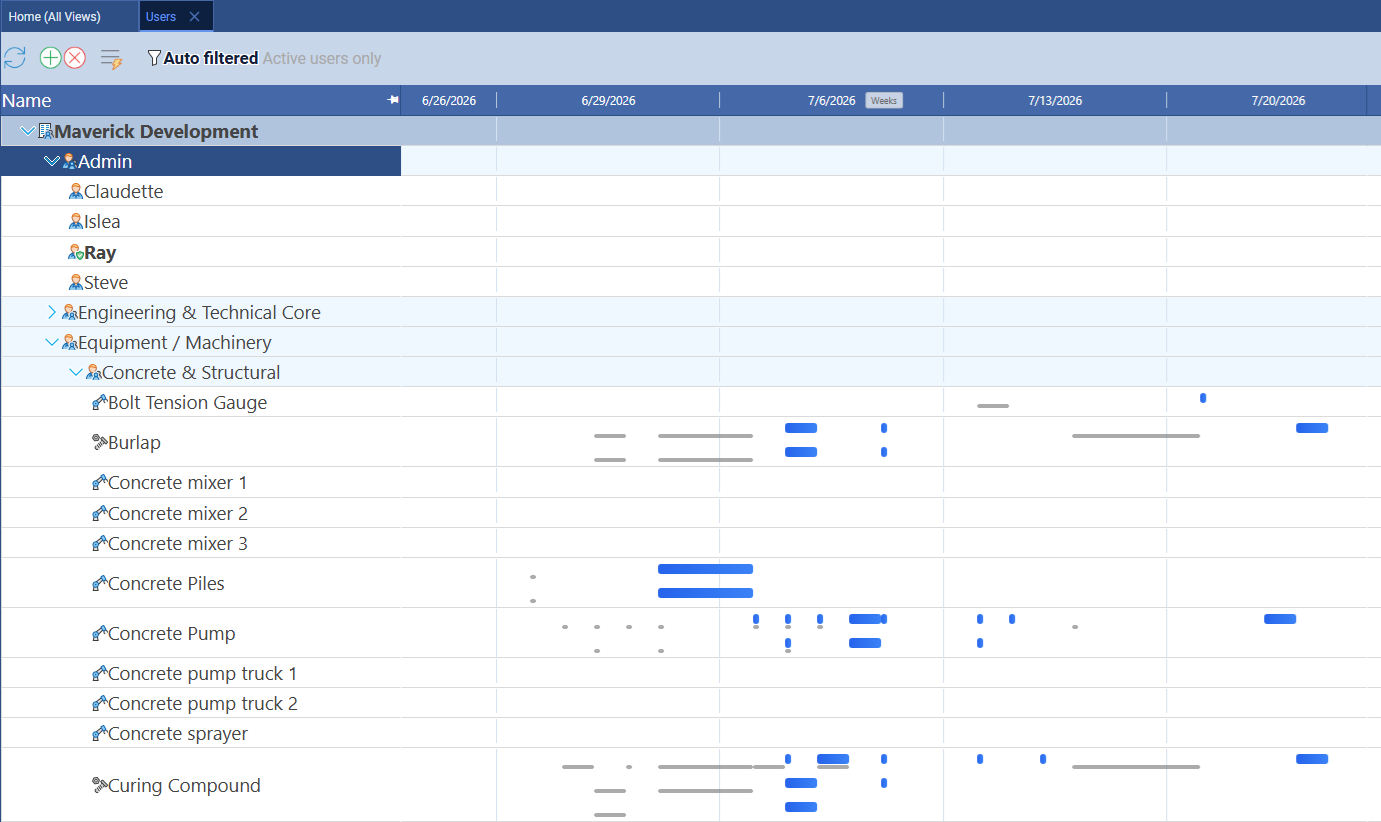
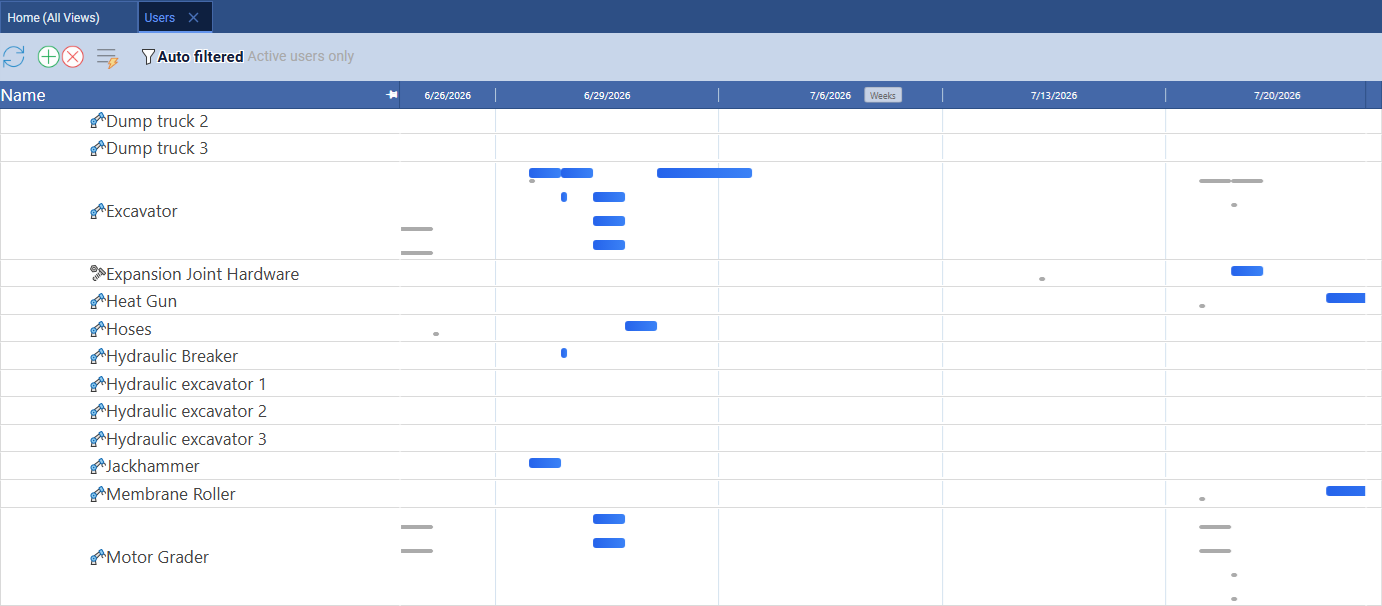
What to look for in the resource Gantt after an AI-built project. Each resource row shows its full task bar history across all projects. For the BESS schedule, the Battery Technician and Crane rows should be dense during the Battery Module Installation phase, then quiet. The Commissioning Engineer row should be active only in Commissioning & Testing. The Relay Specialist should appear on exactly one or two tasks with no overlap. Any resource that shows a red overallocation bar at this stage has overlapping assignments that need to be resolved before work begins — return to Stage 8 and correct the specific conflict.
Related Topics
For a full explanation of Gantt chart task bars, link lines, and the baseline ghost bars used in Stages 11 and 12, see Gantt Charts in Project Management. For how Maverick calculates zero-float tasks and what a procurement lead time on the critical path means for schedule risk, see Critical Path Method. For the workflow of setting, clearing, and restoring baselines when AI suggests structural changes after you set the first one, see Project Baselines: Set, Clear, and Restore. For an explanation of the resource-centric Gantt view used in Stage 14, see Secondary Gantt Charts in Maverick. For how to read the resource allocation bar chart and resolve red overallocation bars, see Resource Allocation Bar Chart. To see how a traditional hand-built schedule compares to this AI-built one, follow the 5MW Solar Plant Buildout blueprint and build the same schedule yourself from scratch.