
What Is a Smoke Test, and Why Run One First?
A smoke test is the shortest possible check that something basic works before you invest time building on top of it. Before you wire up a multi-step Zap with field mappings and a second app, spend five minutes confirming that Zapier can actually authenticate with your Maverick account and pull one real record from it.
This guide is deliberately narrow. It does not cover all 22 triggers, all 20 actions, or building a complete automation — for that, see the full Zapier Integration Guide once your smoke test passes. All you need here is one trigger step and Zapier's built-in Test trigger button — no action step, no second app, and no field mapping yet.

Step 1 — Generate Your Zapier API Key
Zapier connects to Maverick using an API key generated from inside the application — separate from the key used for the OData feed or webhooks.
- Open Maverick and log in with your account.
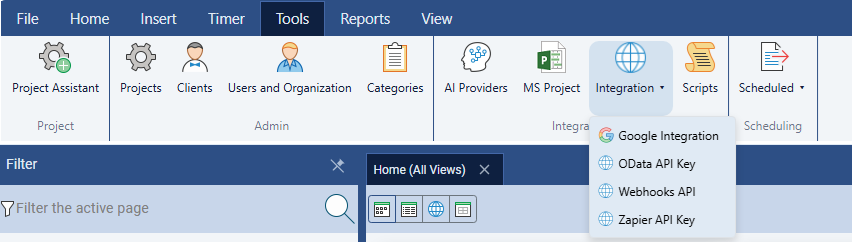
- Click the Tools tab in the ribbon.
- Click the Integration dropdown button.
- Select Zapier API Key from the menu.
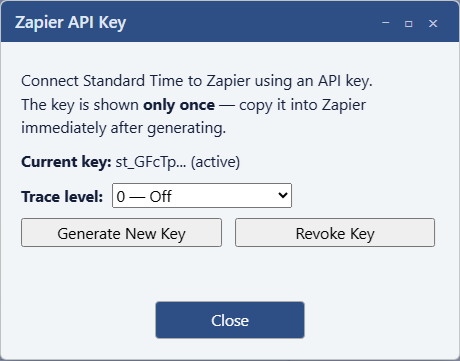
Check for an existing key first. If the dialog already shows a Current key in a masked form, you — or a Zap you already published — may be depending on it. Generating a new key immediately revokes the old one, so any existing Zap using it will start failing the moment you click Generate.
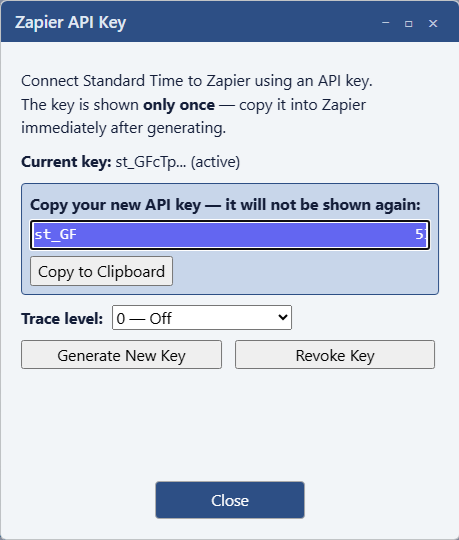
If this is your first key, or you are comfortable rotating it, click Generate New Key and copy the value immediately — it is shown once, in full, and never again after you close this dialog.
You will also need your Customer ID (CID) — the same identifier used to connect Power BI to the OData feed — and your Site URL (for example https://stcloud67.com for cloud accounts, or your on-premise server address). Find the CID in your Maverick account settings.
Step 2 — Connect One Trigger in Zapier
With your key, CID, and Site URL ready, switch to Zapier:
- Sign in to Zapier and click Create Zap.
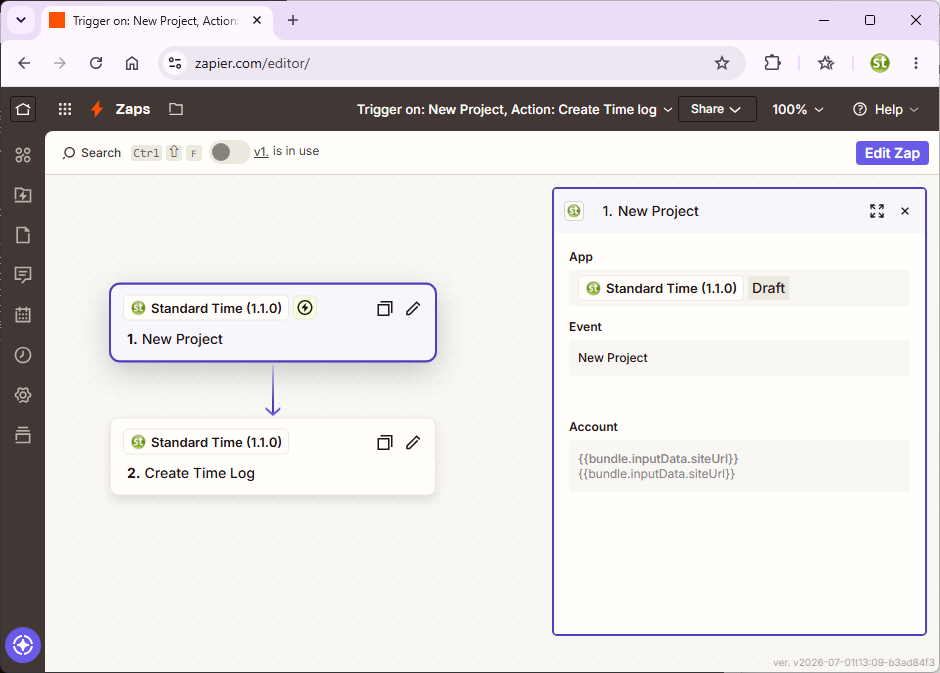
- In the trigger app search box, type Standard Time and select it — that is the underlying product name Maverick's Zapier app is published under.
- Choose the New Project event.
- Click Sign in to connect an account, and fill in the three fields: Site URL, Customer ID, and API Key.
- Click Continue.
That Continue click is itself the first real test — Zapier calls Maverick immediately to verify the credentials. If they are wrong, you will see a connection error right there, before you ever get to a trigger step.
Step 3 — Click Test Trigger
With the account connected, click Test trigger on the New Project step. Zapier fetches one real project record from your Maverick account — not a placeholder — and shows you its fields.
This is a genuine difference worth knowing: unlike the synthetic sample used by Maverick's webhook Test button, Zapier's trigger test reads an actual record from your live data. If you have never created a project in Maverick yet, there may be nothing for it to return — see the troubleshooting section below for what that means.
Step 4 — Read the Result
Success: A Record Appears
If Zapier shows you a real project's fields — name, status, dates, and so on — your connection is fully verified. The API key, CID, and Site URL are all correct, and Zapier can reach your account. You are ready to move on to the full Zapier Integration Guide and add an action step.
Error at the Continue Step
A connection error when you click Continue in Step 2 almost always means one of the three fields was wrong: a typo in the API key, the wrong CID, or a Site URL missing https:// or pointing at the wrong domain. Re-open the Zapier API Key dialog in Maverick and copy the values again carefully.
"No Data Found" on Test Trigger
This does not necessarily mean the connection is broken. It means your account genuinely has zero records of that type yet — a common situation on a brand-new trial account with no projects created. Either create one quick real project in Maverick first, or pick a trigger type you know already has data (for example, New Time Log, if you have logged any hours).
An Older Zap Suddenly Stopped Working
If you generated a fresh API key in Step 1 and a previously published Zap using the old key just started failing, that is expected, not a bug — only one Zapier key is ever active per user, and generating a new one revokes the last one immediately. Reconnect that Zap's account with the new key, or better, check for an existing key first next time before generating a replacement.
Before You Add an Action: Test Action Is Not Synthetic
If you go on to add an action step — for example, Create Time Log — Zapier's Test action button behaves differently from everything else in this guide. It does not send a placeholder or a sample: it creates a real record in your Maverick account. Clicking Test action on a Create Time Log step logs an actual time entry against whatever project you mapped in that step.
This is the opposite of Maverick's own webhook Test button, which is fully synthetic and touches nothing. Before clicking Test action, map your fields to a project or record you do not mind adding test data to, and clean up the test record afterward if it matters for your reporting.
You Passed the Smoke Test — What's Next?
With the connection confirmed, here is where to go depending on what you are building:
- Zapier Integration Guide — all 22 triggers, all 20 actions, and a complete walkthrough of building your first working Zap with an action step.
- Native Webhooks Integration — if you want the same real-time events delivered to your own server instead, including delete events, which Zapier does not support.
- Smoke-Test Your Webhook Connection — the companion guide for verifying a webhook subscription with zero side effects.
- Power BI OData Integration — if what you actually need is a reporting dashboard rather than event-driven automation, pull the same 11 objects on demand instead.
- Smoke-Test Your Power BI Connection — the companion guide for verifying an OData connection before building a report.